The "Tower of Power" Welding Cart Project
My first MIG weld project: The Tower of Power Welding Cart
Hi folks, this is my little corner where I drop pics and dialog of stuff I've built in the garage. I use my humble garage, I which transformed into a multi-purpose shop to allow me to wield power tools in the pursuit of building stuff... and to figure out things, figuratively and mentally. Took me a long time but it works for me.
Yeah, I make stuff, most times with no previous experience. Nothing professional-grade, but mostly over-built chunks of wood and steel. I leave the sleek, powerful design to the engineers at Ferrari and Koenigsegg.
So without further ado, here's my first use of my MIG welder and plasma cutter, and the "Tower of Power" Welding Cart Project:
After cruising the homemade welding cart sites online, I started getting ideas of what my robust, fully featured welding cart should look like:
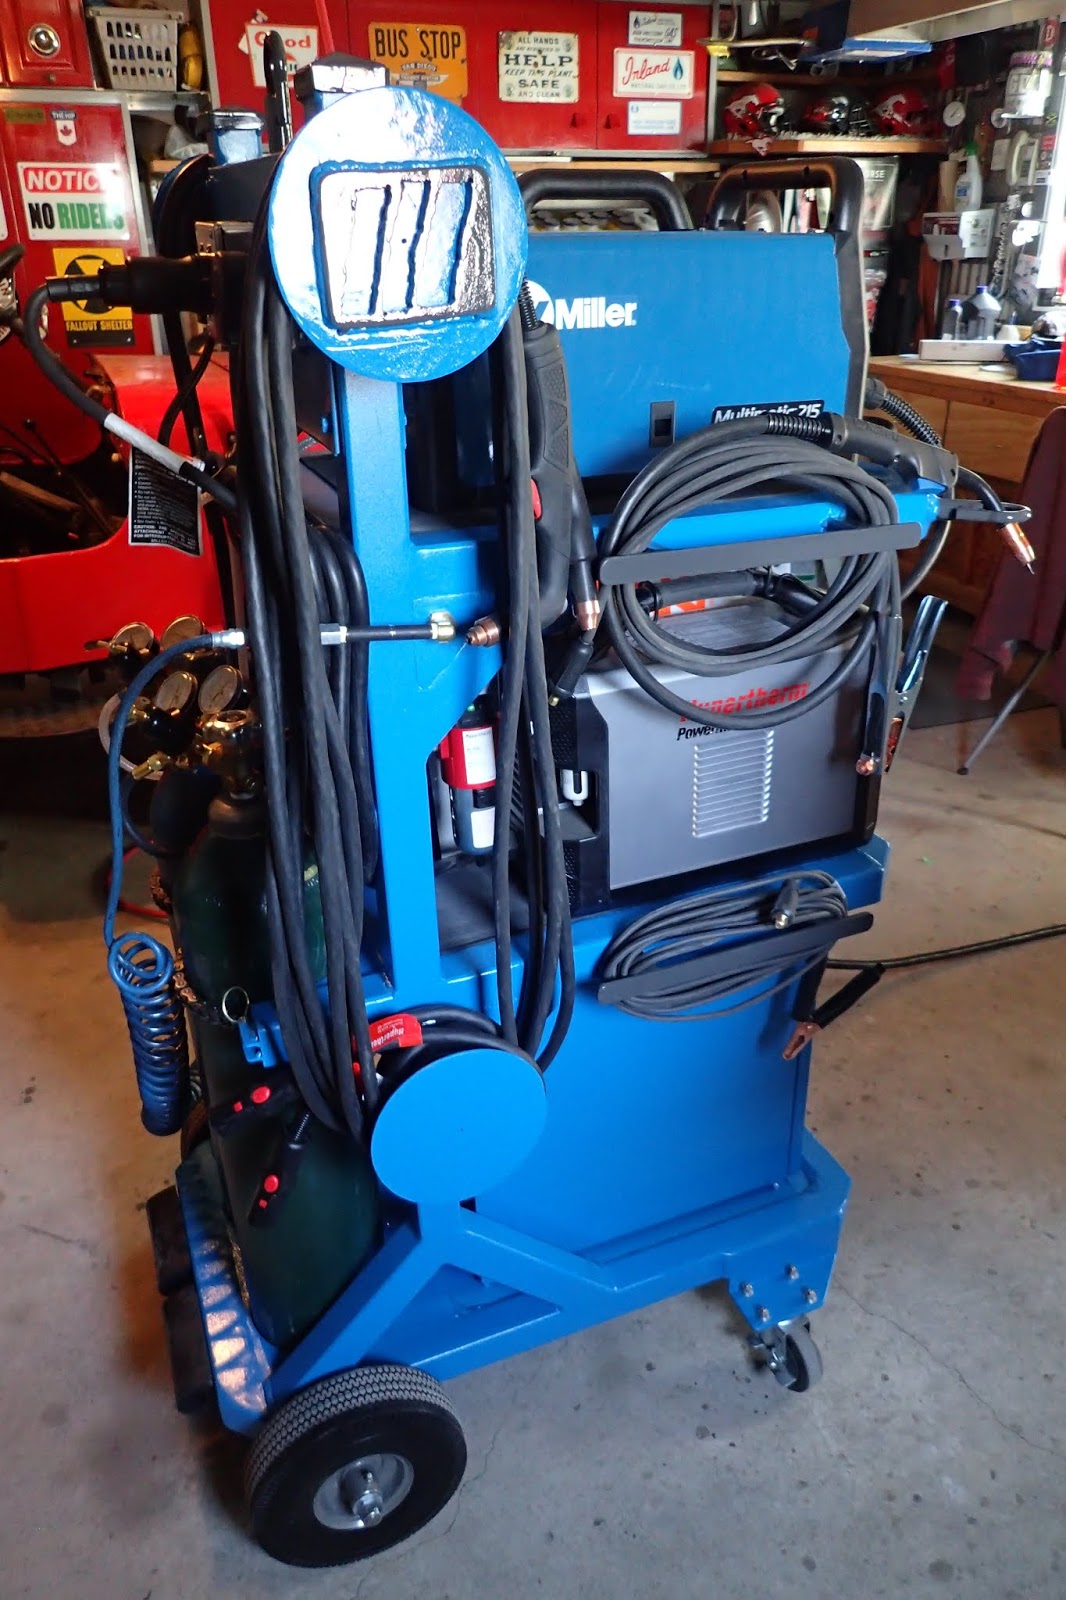
A tall tough tower: enough room to hold my multipurpose welder, TIG welder and plasma cutter. The ability to safely secure two gas bottles: C25 and argon. Enough room to carry all the cables and lines that come with three machines. The tower has to be built heavy-duty to be able to carry all this payload securely.
Storage space: a place to store accessories and consumables. I don't want welding stuff strewn around the shop. I hate looking for stuff all over the place. Everything needs a place.
Power/Air Station: the ability to have all the machines to plug into the tower with 220V power. Then have the mobility to move the cart to any project within my shop... a 7.5 metre radius. Compressed air hook-up on the cart, so the plasma cutter just plugs into the welding cart. Not all the way to the shop compressor.
The cart frame is built from 2x2x1/8" steel tubing and 10 gauge plate... some scrap, some new. Used regular .030 mig wire... lot of wire and a LOT of grinding wheels!
At this point, I need to give credit where credit is due. I found different components of my criteria on the internet at the knowledgeable posts of:
I got the basic tower design from "Mr. fullscale":
As far as making my welding cart a 'full service' station, I got a lot of valuable tips from the boys at:
Earlier, I built my welding table using a stick welder (Miller Dialarc 250), but here's my first project using my MIG welder (Miller Multimatic 215). I took an evening welding course at SAIT (Southern Alberta Institute of Technology). Enough to make me functional and dangerous. Pretty? No. But I think the metal will 'stick'.
If you've wasted this much time reading my schlock, you might as well check out the rest...
So here's the pictorial progression of my first MIG project, the Tower of Power welding cart:
 |
Gotta have a plan... |
 |
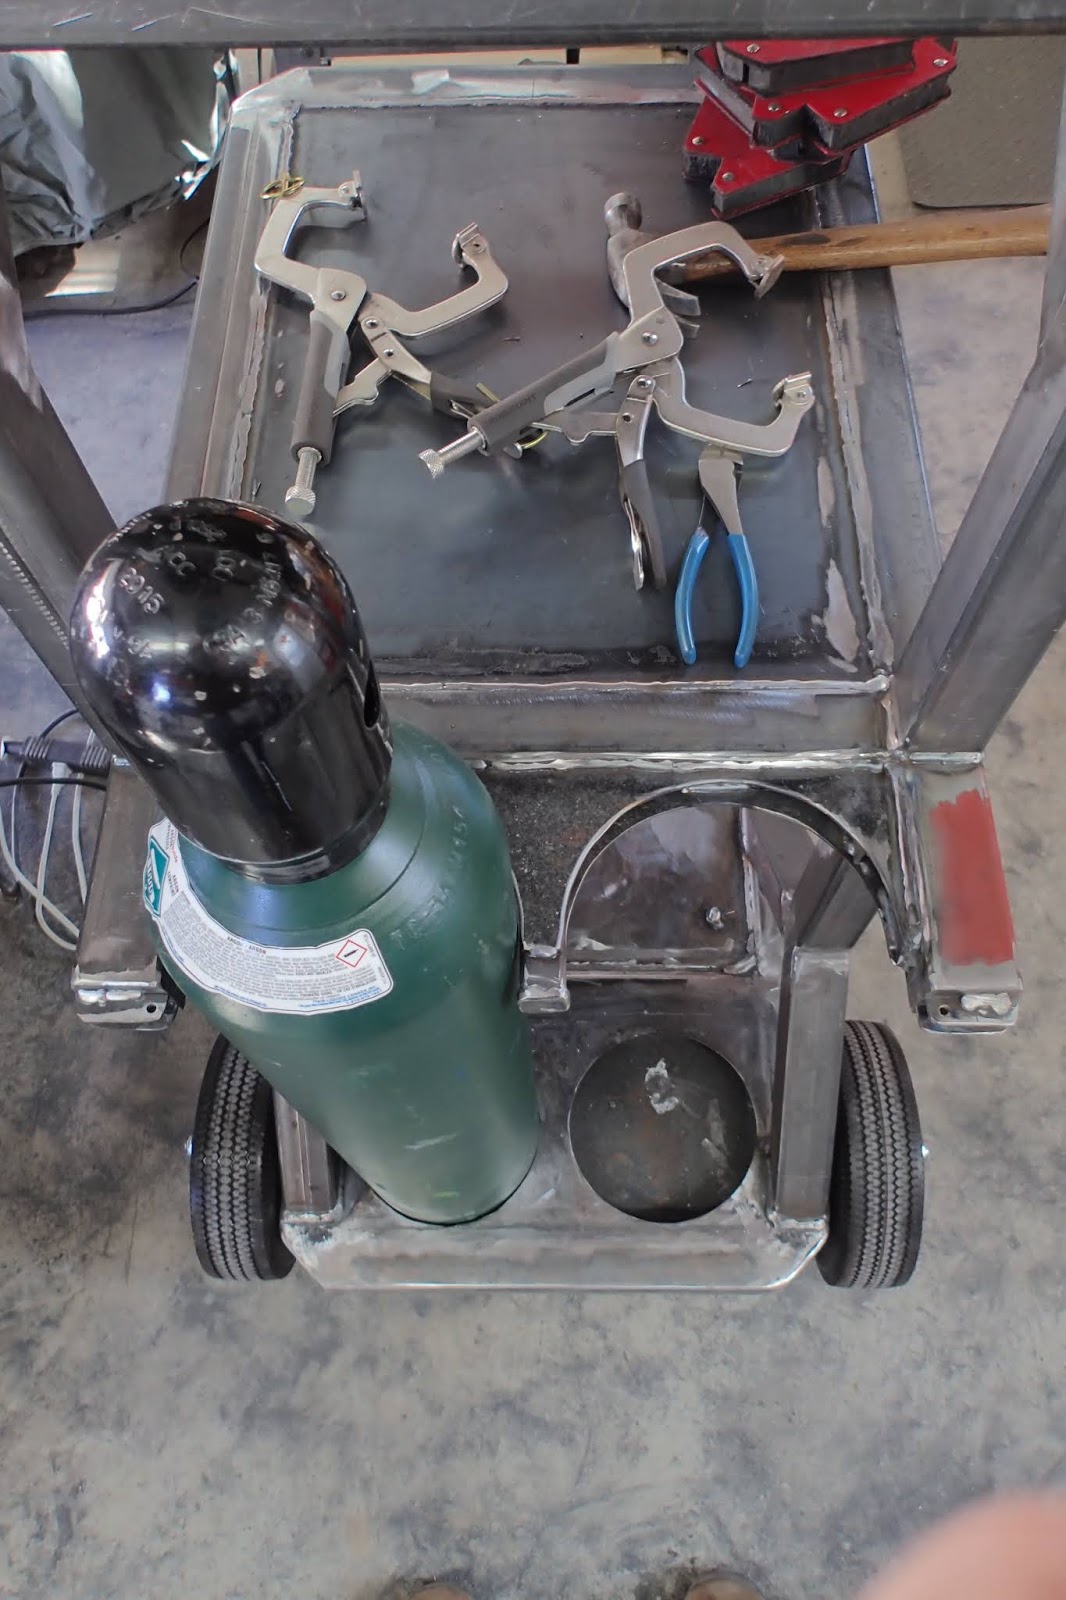
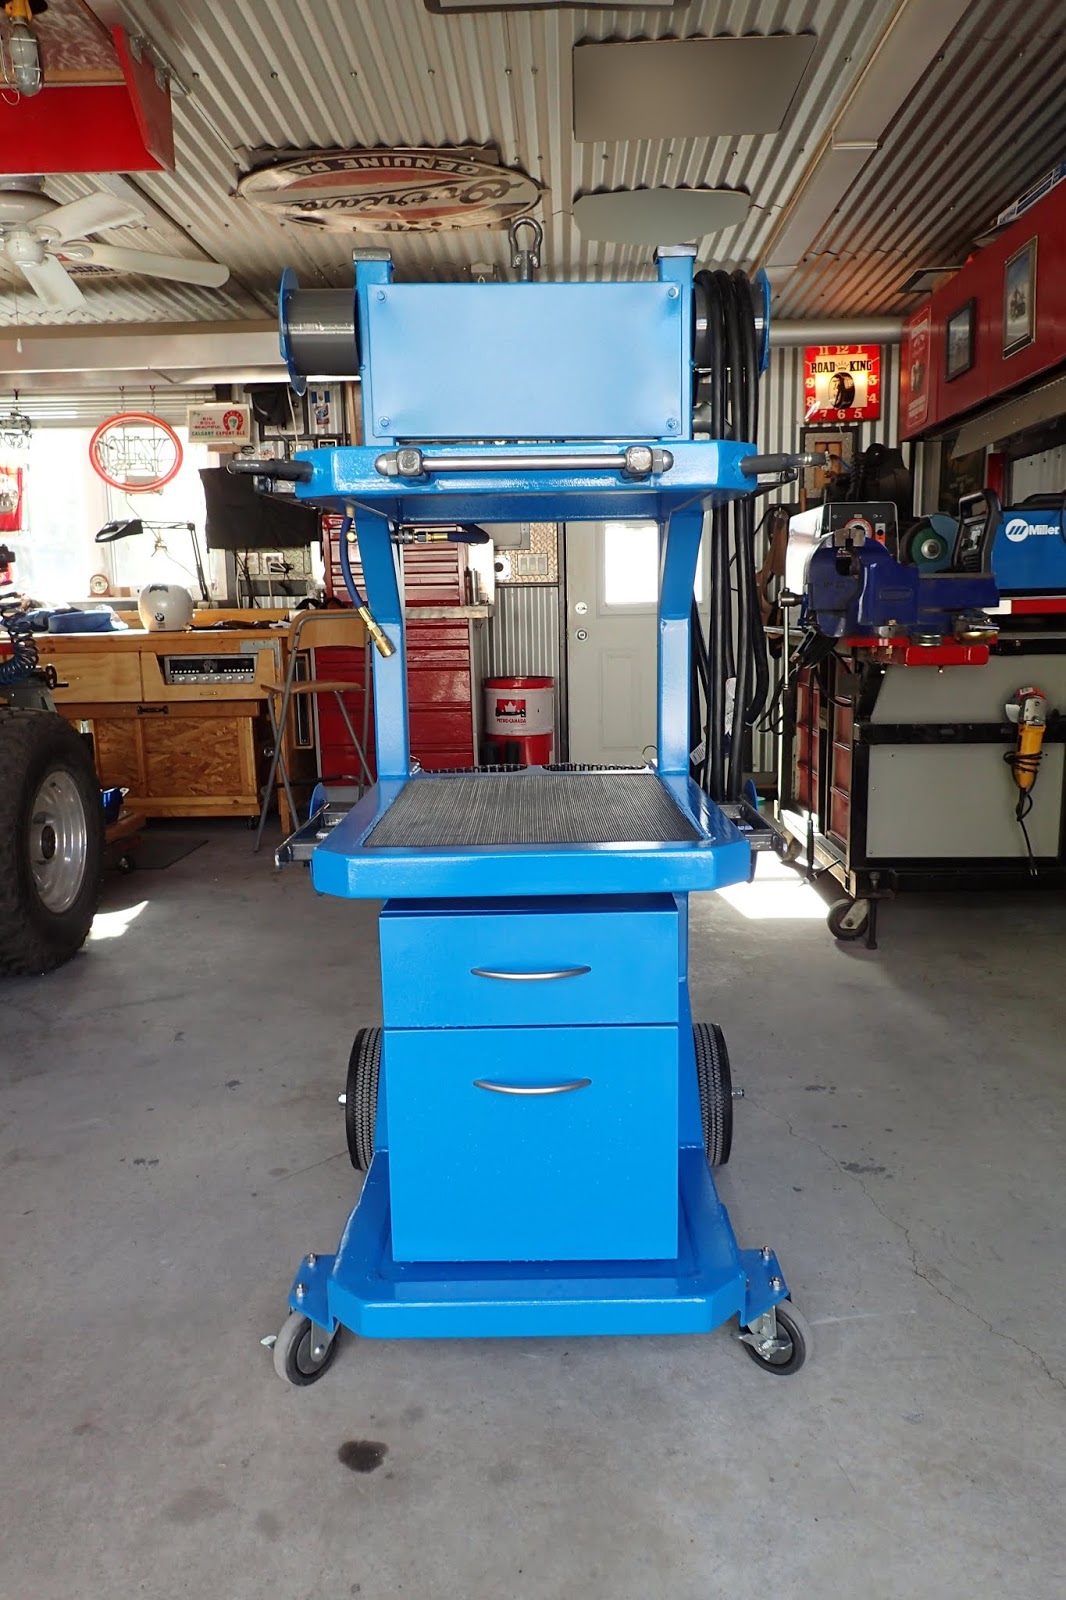
Building the base. If you've built a fab welding table, you might as well use it and try to keep things 'straight'. As I mentioned, grinding/buffing wheels did a great job to mask my 'basic' welding skills... base finished.     Basic tower done... now on to the shelves, etc.      Shelves and basic tower done.   Base plate and storage drawers (a little filing cabinet will do) done for now. Gotta build a base in the back for the gas bottles...    Cut and welded in, the holds for the bottles done.    5/8" axle threaded and welded to the base with 5" flat-free wheels in the back and 4" swivel wheels up front. Done. 
At this point, the beast, er, The Tower of Power was getting pretty heavy!
|


Excellent blog...looks like great work...
ReplyDeleteOnly 2 beers? Lol Great build and even Greater idea. 2 THUMBS UP 👍👍.
ReplyDeleteYou should be proud of this. Looks like a really nice build, great attention to detail, and a lot of ingenuity along the way. Nice job! Thank you very much for the documentation.
ReplyDeleteThank you for your kind words. I don’t work fast, but if I take my time, it usually works out well. Take it easy.
ReplyDeleteThat’s awesome how you ran the outlets and air onto the Carley. Such a great idea. I’m in the process of building one myself and definitely gonna do what you done.
ReplyDeleteCarley? His name is Tower of Power! Lol. Glad I can help. Have fun.
DeleteWhat a beautiful job! And congrats on a perfect workshop as well. Thank you for recording this project.
ReplyDeleteGreat job! This is really close to what I've been looking for. This should get me off high center to build my own welding cart! Thanks!!
ReplyDelete